Summer hairstyles split cleanly into two camps: the ones that survive a humid afternoon and the ones that look good in the mirror for twenty minutes before collapsing. The deciding factor is rarely the style itself; it is whether you built tension at the scalp or pinned hope and hairspray instead. A twisted chignon held through three hours in Charleston humidity by letting two counter-rotated sections grip each other, not the pins.
1. Twisted Chignon

Fine hair slips out of most updos by noon in July, but the twisted chignon buys you a full day. Two counter-rotated sections at the crown create friction against each other, so the pins grip actual tension instead of sliding through smooth strands. I watched this hold through a three-hour outdoor rehearsal dinner in Charleston humidity while a standard bun on the same table needed re-pinning twice.
The twist itself takes under ten minutes once your hands learn the sequence: part, twist each side toward the center, pin the seam flat, then coil the tails low. Office air conditioning will dry the twists slightly and give them a cleaner profile by 5 p.m.; outdoor heat softens the surface for a more romantic line at dinner. Same style, two temperatures, no mirror check required.
2. Waterfall Braid

A waterfall braid works best when you wrap it around your crown, starting from the thinner side of your part and moving toward the heavier side. That path keeps the braid visible from the front and gives the "falling" strands somewhere to land naturally.
The trick is adding new hair only from the top section. Each time you cross the upper strand over the middle, you pick up a small piece of loose hair and feed it in. The bottom strand crosses over without collecting anything, so it drops free and hangs down like a ribbon of water. If you grab from both sides, you get a standard French braid instead, dense and flat against your head.
Once the braid reaches behind your ear, you have two clean finishes. Pin it into a low messy bun for errands or humidity-heavy afternoons, or keep it loose and let the remaining strands blend with mermaid waves for evening. The sources both mention this pairing, and it does what summer hair needs: keeps the front controlled while the back stays breezy and off your neck.
3. Twisted Ponytail

A twisted ponytail solves the gap between wash days without looking like you gave up. The twist sits at the crown and draws the eye upward, which conveniently masks oily roots while the ponytail itself stays smooth and deliberate.
The failure point is almost always the twist loosening by noon. I have watched this happen on myself enough times to know that a single elastic at the base is not enough. Two small clear elastics, spaced an inch apart through the twist, lock the section before you ever gather the ponytail. The first holds the initial cross, the second catches the tension as you wrap the remaining length around.
Start with hair that has some grit, either natural or from a light dry shampoo applied the night before. Section the top from temple to temple, twist away from your face, and secure with those two elastics. Then gather everything, twisted section included, into a low or mid-height ponytail. A dab of smoothing serum on the ponytail only, not the twist, keeps the contrast clean.
Five minutes, and the style reads as intentional rather than a cover-up. The real test is whether it survives a commute; this one does, provided you did not skip that second elastic.
4. Braided to One Side

A single braid swept to one shoulder does the work of an updo without requiring enough length to pile on top of your head. The style keeps the neck free for breeze and sunscreen while still showing off whatever length you have been growing out since January. I found the version that stays put starts with a deep side part drawn almost to the crown, not a timid inch off center. The part creates natural tension that anchors the braid against your head as you sweep everything over the opposite shoulder.
Humidity is where this either holds or falls apart. The braid itself protects the length from frizz, but the hairline and part area need help. A light styling cream worked through damp hair before braiding gives the surface enough grip to survive a 90-degree afternoon without puffing into a halo. I braid loosely for the first two inches, pull the rope forward to check the drape, then tighten from there down. Too tight against the scalp and you lose the soft curve along the jaw; too loose and the whole thing slips backward by lunch.
This is one of the few summer styles that looks intentional at 7 a.m. and still reads as put-together after a full day outside. The side placement also means you are not leaning against a braid when you rest your head on a beach chair or car seat.
5. Braided Bun

A braided foundation changes how a bun behaves on a hot day. The braid grips the hair from the scalp outward, so the bun itself needs fewer pins and none of them dig against the skull the way a standard twist demands. I learned this the summer I stopped redoing my bun every two hours; the braid locks the shape in place.
The braid should sit at the crown, not the nape. It adds texture where a plain bun goes flat, and it lets the finished knot sit lower and wider against the head instead of perched on top like a top knot. The result reads as deliberate, not like hair you scraped up to get off your neck.
Start with a Dutch braid running from the hairline to the crown, then coil the remaining length into a bun at the occipital bone. The braid’s raised ridges create friction against the rest of the hair, so the coil stays put without the usual armada of bobby pins. Fine hair benefits most; the braid bulks out the foundation so the bun doesn’t shrink to nothing by noon.
6. Messy Buns

A messy bun lives or dies on the line between artful and actually sloppy. The difference is texture spray and placement, not luck. I start with dry shampoo or a light spray through the mid-lengths so the hair has grip; clean hair slides apart and the knot deflates by noon. The knot belongs at the crown or just above, never at the nape, because gravity wins in summer humidity and a low bun collapses into a neck sweat disaster.
Three or four face-framing pieces change everything. Pull them deliberately before you twist the hair, not after, or the tension looks accidental in the wrong way. Twist loosely, wrap once, and pin without pulling the ends all the way through. The scrunchie helps here, a summer staple that adds volume and holds the shape without the helmet effect of an elastic. What reads as breezy on the street looks like you gave up if the bun sits too low, too tight, or too neat. The charm is in the visible decision.
7. Space Buns

Two high buns land in that rare spot where a style looks deliberate even when you threw it together in a parking lot. The trick is the gap between them. Too close and the buns melt into one lumpy shape; too far apart and they sit like ears on a cartoon bear. I aim for about the width of my own palm, measured temple to temple, which keeps them reading as a pair rather than a mistake.
Scrunchies dress the look up fast, especially velvet or satin ones that catch light at a dinner table. Without them, the style stays minimal enough for a grocery run. Either way, the hair stays off your neck, which is the whole point once July hits.
Nothing beats an easy, breezy hairdo at this time of year.
— Vogue
That line is why space buns keep resurfacing every June. They take under five minutes, survive humidity, and still photograph well enough that Dove Cameron wore them on a red carpet. For most of us, the same style works at a backyard barbecue with no adjustment at all.
8. Perfect Ponytail

A polished ponytail lives or dies at the nape of the neck, where the elastic sits and where summer humidity turns a clean line into a bumpy mess. I smooth a dime-sized amount of styling cream through the crown and sides while the hair is still slightly damp, then brush everything back with a boar-bristle brush before the product sets. The brush matters more than the cream; a paddle brush leaves micro-gaps that become ridges once the ponytail is pulled tight.
Tilt your head back before you secure the elastic, not after. Most of us look straight into the mirror, fasten the band at the level we want, then drop our chin to normal position and watch the ponytail sink an inch lower, loosening against the neck and picking up every irregularity underneath. With the head tipped back, the elastic catches the hair at its true tension; when you lower your chin, the band stays put and the underside stays flat. Place the elastic exactly where you want the finished ponytail to sit, usually at the occipital bone or just above it for a clean line that lifts the face without reads as trying too hard. A coated band without metal prevents the snagging that breaks the smooth surface halfway through a hot afternoon.
9. Sleek High Ponytail

A sleek high ponytail sits an inch or two above where you normally tie it, with every strand glued flat to the scalp rather than floating free. The look reads polished rather than sporty because nothing escapes; flyaways are the enemy here.
You need two products minimum: a strong-hold gel or pomade raked through with a fine-tooth comb, and an elastic that will not stretch out by noon. I have watched cheap elastics sag within two hours on a humid July afternoon, dropping the pony from crown to mid-head and killing the whole effect. Spend the extra on a coated band meant for athletics, or at least double-loop a standard one.
The elevation matters more than most people notice. Pulling the anchor point higher at the crown stretches the eye upward, which softens a rounder face and lengthens a shorter neck. If you have a longer face already, keep the ponytail itself thick and horizontal at the base to add width back in.
Wet the gel slightly with a mist of water if your hair fights the comb, then work in sections from the hairline back. One pass never gets it smooth enough; three or four, reapplying product where you feel bumps, is closer to right.
10. Bubble Ponytail

A bubble ponytail turns the simplest summer style into something that reads intentional from thirty feet away. The build is straightforward: pull hair into a standard ponytail, then add elastics down the length in even sections, spacing each about two inches apart. After every band goes in, you tug the hair gently outward between the elastics until it rounds into a bubble shape.
Getting the spacing right matters more than getting it perfect. Eyeballing works fine, but uneven gaps throw off the whole rhythm. I find it easier to place the first elastic at the base, decide where the last bubble should sit, then split the difference for the middle bands. If a section starts to slip during the day, a tiny clear elastic underneath the decorative one acts like insurance without changing the look. For fine hair that refuses to hold volume, backcombing the section just slightly before you bubble it out keeps the shape from collapsing by noon.
This style survives humidity better than most because the elastics lock everything in place. It also takes under five minutes once you have the spacing down, which makes it one of the few "styled" looks that does not demand a morning sacrifice.
11. Top Knot Bun

A top knot bun sits at the crown of the head, which pulls the eye upward and buys you a little height on muggy days when everything else feels like it’s sliding down. The placement matters more than the wrapping technique: too far back and it reads librarian, too far forward and you’re wearing a hair donut as a hat.
The trick that keeps the ends from sprouting is twisting the tail around its own base rather than coiling it flat against your scalp. Wrap the length like a rope, let it tighten into a small cylinder, then pin where the rope crosses itself. Three bobby pins usually do it: one at the base to anchor, two catching the overlapping turns. The ends tuck inside the twist instead of poking out to be individually skewered.
I tried this on a Saturday when the humidity hit before I finished coffee. One elastic, three pins, and the knot stayed through a walk to the pharmacy and back. No mirror check needed, which is the real summer win.
12. Half Up, Half Down

A half-up, half-down style lives or dies by where you draw the section line. Too high and the back collapses into a failed ponytail; too low and the top layer slides out before lunch. The tips of your ears mark the safe zone, dividing what stays down from what goes up. I spent one July morning resetting a too-high attempt every twenty minutes before I understood that the ear-tips rule actually works. Leave face-framing pieces in front, especially if your hair is fine or freshly washed, since the grip at the crown needs texture to hold. A low set placement keeps the silhouette relaxed rather than gym-ready. The style holds best when the bottom half carries real weight, so resist pulling more than a third of your total length upward.
13. Romantic Braid

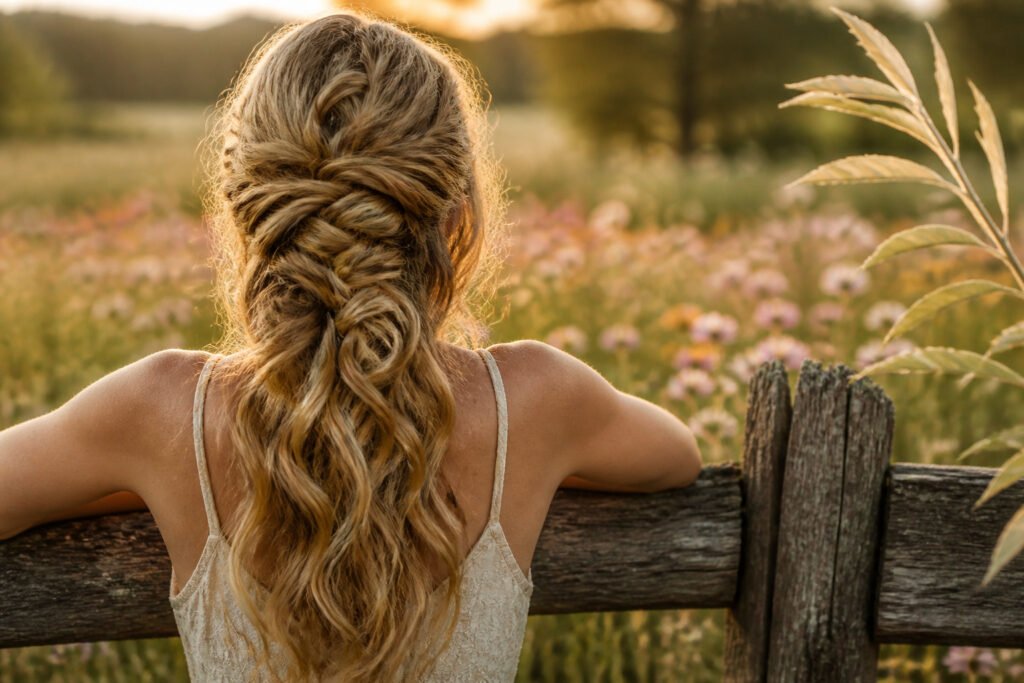
Loose braids that look like they fell apart on purpose live or die by the tension you keep at the crown. I start every summer version of this style with a light backcomb at the roots, just enough to hold the height without turning the top into a helmet. The braid itself gets done with the smallest elastic I own, pulled to the very end so nothing slips while I work.
Pancaking without unraveling means holding the tail below the elastic in one hand while you tug only the outer edge of each loop with the other. I use the pad of my finger, not the nail, and I pull outward, not downward. Downward loosens the cross of the strands underneath; outward just flattens the surface loop. Two, maybe three gentle tugs per section is the limit. The wispy pieces around the face come last, pulled from the hairline with a tail comb, never the fingers, so the release is clean and not a fuzzy break. The braid ends up almost hidden inside the softness, which is exactly the point on a humid July afternoon when anything tighter would feel like a headband clamped too long.
14. Mermaid Waves

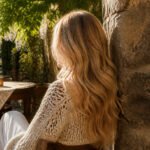
The difference between mermaid waves and standard beach waves comes down to pattern and placement. Mermaid waves sit lower on the shaft, starting well below the roots so volume stays away from the scalp, and the wave itself runs deeper and more regular than the random, piece-y texture of beach waves. Where beach waves look like wind and salt did the work, mermaid waves look like you stepped out of water with hair that dried in perfect ripples.
A triple barrel iron is the tool that gets you there in one pass. The longer your hair, the more dramatic the effect; waist-length strands carry the full, continuous ripple that makes this style read as editorial rather than accidental. For summer specifically, the root-avoidance matters more than it might in other seasons. Sweat and humidity already do enough lifting at the scalp, so starting the wave lower keeps the shape controlled instead of poufing into something unintended by noon.
This one works for the beach or for a date, which is the test of a useful summer style: it should not need rethinking when plans shift.
15. Corkscrew Curls

Tight spirals hold their shape through August humidity better than almost any other curl type, and the difference comes down to physics. A small barrel curling wand, wrapped with thin sections and pulled slowly, sets the hair into a compact coil with less surface area exposed to the air. Loose waves unfurl fast; these corkscrew curls stay locked until you decide to break them up.
The prep matters as much as the tool. Heat protectant spray goes on before any hot tool touches the hair, full stop. I pin each fresh curl with a clip while it cools, which sounds fussy until you try skipping it and watch the shape drop by noon. Once they’re fully cool, fingers or a wide brush tease the spirals into softer texture without collapsing the structure. A light hairspray finish locks the hold without the helmet effect.
For a big summer event, these work worn loose or gathered into a bouncy ponytail. The ponytail version especially: the curls keep their bounce at the crown instead of going limp by the third hour outside.
16. Low Half-Up Half-Down

Gathering hair at the nape instead of the crown changes the whole mood of a half-up style. The volume sits lower, which reads as intentional rather than effortful, and the silhouette stays cleaner against a summer blouse or dress neckline. I started pulling mine back this way after noticing how crown-height half-ups can feel like they are trying for prom when I am just walking to coffee.
A small clear elastic at the nape keeps the section secure without the bobby-pin archaeology that higher placements need. The gathered hair should sit right where your neck meets your skull, not sliding down toward the shoulders. That placement is what makes it read as a style choice rather than a halfway measure.
For texture, second-day hair works better than freshly washed. If yours is too clean, a light mist of dry shampoo at the roots before you section adds the grip that keeps wisps from escaping in humidity. The face-framing pieces you leave out should be narrow, about an inch wide on each side, or the whole thing starts looking accidental rather than restrained.
This version transitions cleanly from a morning meeting to evening drinks without needing a redo, which matters more in July than we admit.
17. Romantic Updo

A soft, unstructured updo lives or dies on the tension you choose to keep. Twist sections from each temple toward the crown, letting the motion be loose enough that strands slip free on their own. The pieces that escape are the point, not a flaw, so resist the urge to smooth them back in.
Pinning matters more than braiding here. Work with the natural direction of each twist, securing with thin bobby pins pushed flat against the scalp where the cross holds. Two pins per twist, crossed in an X, keeps the shape anchored without the rigid grid a braid would give you. The back stays lower and wider than a formal chignon, more tousled bun in spirit, with slightly thicker strands deliberately pulled out and pinned down to float rather than hang.
The whole thing takes about ten minutes once the motion feels familiar, and it holds through heat and wind better than you’d expect because the weight distributes low. Second-day hair helps, since clean strands fight the soft collapse that makes the style look intentional rather than failed.
18. Fishtail Braid

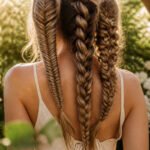
A fishtail braid only ever uses two strands, not three, which is the first thing that makes it feel manageable on a humid morning. You split the hair in half, then take a small section from the outside of the left piece and cross it over to join the right piece. Repeat from the right side, pulling small sections and crossing them over to the left, and the pattern builds itself.
The tight version sits close to the scalp and keeps every layer locked down, which is what you want if you are heading out in actual heat and need the neck clear. The loose, pulled version is the same braid worked gently and then tugged outward section by section so it widens and softens. That one reads more romantic but will slip faster if you are sweating; it works better for evening when the temperature drops. I have found that starting with a tiny clear elastic at the end, then sliding it down and trimming it off once the braid is secure, saves the whole thing from unraveling before you have even finished crossing the last few pieces.
19. Dutch Braid

A Dutch braid is the reverse of a French braid, with sections crossing under rather than over so the finished rope sits raised on top of the hair. That raised profile catches light and camera angles better than a flat French braid pressed against the scalp, which is why it reads as more dimensional in summer photos.
The technique starts like any three-strand braid, but each new section of loose hair feeds underneath the working strand instead of over it. The result is a plait that appears to float above the surrounding hair, adding immediate volume even on fine textures. For summer, this structure holds up against humidity better than loose styles, and the braid’s raised edges create natural ventilation at the scalp. I find it works best pulled slightly loose after finishing; the under-crossing technique gives enough built-in structure that the braid won’t unravel, while the relaxed width looks more casual for daytime heat.
20. Double Dutch Braids

Two Dutch braids running from hairline to nape look symmetrical only if the parting is straight down the back, and that line is harder to draw than most people expect. I have learned this the slow way: without a second mirror, the back of your head is a blind spot, and your hands will drift to the side you favor. A handheld mirror held behind you, angled to catch the bathroom mirror, gives you the view you need. Even then, the part wants to wander.
Tension is the other place this style falls apart. The braid you start first feels easy; the second arm tires, and the pull loosens by the time you reach the nape. I check both braids at the crown, then again at the ear level, and adjust before the pattern sets. A too-tight Dutch braid will lift from the scalp and gap; too loose, and the braid collapses into a rope with no structure. The sweet spot is firm enough that the crossed-under sections sit flat but not so tight that the scalp shows between them. If one braid ends thicker than the other, you were pulling harder with your dominant hand. Undo the tighter one and rebraid with lighter tension, matching the looser side instead of the other way around.
21. Criss-Cross Hairstyle

Crossing two sections of hair at the crown creates an X pattern that reads cleanly from the front, and that clarity is what makes this style work for summer. Four to five equal sections give the crisscross enough material to hold the rest back without looking sparse; fewer than that and the pattern collapses into a single twist that loses the geometry entirely.
The style functions as a half-up look on its own, or you can gather everything below the cross into a bun or ponytail for a full updo that stays off your neck in humid weather. Thin hair ties keep each section distinct without adding bulk at the crossing point, which matters more than you’d think if you’re wearing it for several hours outdoors.
22. Boho Twist Braid

The boho twist braid works best when you stop aiming for symmetry. Start with a low side part and pick up small sections as you twist downward, but let the spacing stay irregular; some pieces get gathered an inch apart, others three, and that randomness is what keeps it from looking like a French braid that lost its nerve. Texture helps hide mistakes, so second-day hair or a light spritz of dry shampoo at the roots gives you the grip and the matte finish that sells the look.
What moves this from "I tried a braid" to actual bohemian style is leaving the tail loose and pulling a few face-framing pieces free before you finish. Pearls or small metal pins at the twist itself dress it up for evening without requiring a restart. The braid holds better if you secure it with a clear elastic while it is still slightly damp, then tug the edges wider once it dries; that trick buys you a full day before the pieces slip out.
23. Braided Bohemian Hairstyle

Small braids scattered through loose hair give you the contrast that makes this style read as bohemian rather than just messy. The trick is placement that frames your face rather than cluttering it. I start two or three braids back from each temple, working toward the crown, and keep them small enough that they disappear into the surrounding waves rather than sitting on top like cornrows.
Mixing sizes matters more than mixing patterns. One slightly thicker braid near the hairline, maybe the width of a drinking straw, paired with two or three finer ones behind it, creates depth without looking like you lost track of what you were doing. I space them at least two inches apart so the loose hair between them stays a visible part of the style, not just background noise.
For summer, this works because the braids hold their shape even when humidity frizzes everything else. You can pull the rest into a low ponytail if the temperature spikes, and the braids still do their job of looking intentional. The whole thing takes maybe ten minutes once you stop overthinking symmetry, which in my experience is where most people stall out and reach for a topknot instead.
24. Mini Braid Hairstyle

A single mini braid at the temple turns ordinary hair into something that looks intentional without trying too hard. The braid itself takes under two minutes once you get the sectioning right: part off a slice no wider than a pencil, braid to the end, and pin it behind the ear or let it disappear into the rest of your hair.
The real trouble starts if you treat the end like a regular braid. Thin braids have so little weight that elastics slide right off, and by noon you are wearing a frizzy ribbon instead of a clean line. Double-wrap a clear elastic at the tip, or loop the last half-inch back through itself so the band grips twice. On my own hair, a single wrap lasted maybe three hours before the braid started feathering apart; the doubled version held through an outdoor dinner.
Placement changes the whole effect. A braid tracing the part line reads as delicate and slightly formal, while one tucked behind the ear looks like you did it yourself in the mirror, which you did. Either way, the surrounding hair stays loose and catches any breeze, so you get the structure of a braid without the heat of a full updo.
25. Flower Hair Clips

Artificial or dried flowers clipped into finished styles add a seasonal, playful touch that reads as effort rather than afterthought. The placement matters more than the bloom itself. One large clip anchored at the side, just above the temple, works best with a low bun or waves swept to one shoulder; it gives the eye a single focal point and stays balanced through an evening. Scattered small blooms suit looser styles, though they risk looking accidental unless you mirror them roughly across the part.
Straight hair presents the real problem. A bobby pin crossed behind the clip, teeth down, catches the hair shaft where the clip alone would slide. On fine hair, a tiny spritz of dry shampoo at the anchor point adds the grip that keeps the arrangement in place through humidity. I skip the floral wire some tutorials suggest; it kinks the hair and shows if the wind shifts the bloom even slightly.
26. Butterfly Hair Clips

The butterfly clip revival lands differently now than it did in the early 2000s. Back then, the look was almost aggressively girlish, a uniform of Limited Too glitter and mall culture. Today the same clips read as deliberate, even slightly ironic, a way to add structure to grown-up hair without pretending you’re sixteen again.
Placement is what makes the shift work. Symmetry, two clips framing a center part, feels clean and editorial, something you’d see on a thirty-two-year-old with a linen blazer. Clustered at one temple, three or four iridescent wings catching light, reads more playful but still controlled, the kind of detail that elevates a ponytail rather than decorating it.
The clips that look expensive are the ones that catch light without catching attention, small enough to disappear into the hairstyle until you turn your head. Plastic that reads as glass, not costume. I’ve seen the cheap ones too, oversized and neon, and they snap the whole look back to 2003 in the wrong way.
For summer specifically, they solve a real problem: keeping face-framing pieces lifted off your neck without the severity of a full pull-back. The clip does the work of a bobby pin but with presence, a functional piece that happens to look like you planned it.
27. Blinger Hair

Blinger hair sits at the far end of the summer accessory spectrum, the point where decoration becomes jewelry you wear in your strands rather than on them. Rhinestones, flat-back gems, and thin metallic cord get pressed or woven in with medical-grade adhesive or threaded through braids so they catch light with every turn of your head. The effect is dramatic, unapologetic, and demands more planning than a clip you slide in at a stoplight.
What stopped me from trying this sooner was the commitment. A well-placed gem cluster or metallic thread line through a cornrow will hold through heat, humidity, and a full day of wear, but removal needs patience and the right solvent. I learned that ordinary rubbing alcohol works on most skin-safe adhesives, though you let it sit for a full minute before you lift, never pull. Oil-based removers can leave residue that dulls the next day’s style. The gems themselves are reusable if you collect them during takedown, which offsets the higher upfront cost against clips you replace seasonally.
Quick Styles for Heat and Busy Mornings

The twisted chignon lands under ten minutes from start to finish, no curling iron required, which makes it the kind of style you actually reach for when the bathroom mirror is already fogged from humidity. Two hair elastics and a handful of bobby pins handle the twisted side bun variation, and that minimal toolkit matters on mornings when you’d rather not dig through a drawer of half-used products.
The twisted ponytail takes five minutes flat, and the sources note it was designed around dirty, unwashed hair, the exact condition most of us wake up to in July. It holds through chasing kids or running errands, then transitions to dinner without a redo. The top knot bun strips the process down even further: one step, a few pins, done. Some use natural hair, others add a clip-in bun extension for fullness, but either way the heat stays off your neck and the time stays under a commute stoplight.
What separates these from the styles that collect dust in your camera roll is the time ceiling. Under ten minutes means no negotiation with the snooze button. Under five means you can do it with coffee in one hand. The summer versions that survive are the ones that account for both the heat and the hurry.
Dressing Up or Down the Same Style

A twisted ponytail is the style I reach for when I need one look to carry me from a morning of errands to a dinner reservation without starting over. The version that takes about five minutes to throw up on dirty, unwashed hair still reads polished enough for a night out because the twist itself creates structure. That same versatility shows up in a few other styles worth keeping on rotation. The triple braid mixes French, fishtail, and three-strand braids into one piece that reads casual for everyday or intentional enough for a fancy occasion depending on how you finish the ends. A low half-up, half-down style works the same way; keeping the gathering low and pulling out face-framing pieces makes it soft for day, while the same proportions hold up under evening light. The braided-to-one-side look functions similarly, with a subtle braid securing everything onto one shoulder so it works for work or school but still looks formal enough for a wedding or dance. The real win is choosing styles built from tension and placement rather than volume, since those two elements shift cleanly between contexts without extra product or heat tools.
Keeping Hair Off Your Neck

The back of my neck is the first place I notice summer. Three minutes outside and the hairline starts to dampen, then the strands stick, then I’m either twisting everything up in a parking lot or suffering through dinner. Buns, braids, and ponytails work because they lift the hair off the skin entirely, letting air move across the neck and cutting the sweat that down styles trap against you.
Messy buns and space buns handle this best for different reasons. A single messy bun sits low enough to clear the collar but high enough to stay off the damp hairline, and the deliberate looseness means you are not fighting flyaways every time humidity spikes. Space buns split the weight across two points, which matters more than it sounds on thick hair days when one heavy knot gives you a headache by noon.
Braids do the same job with more security. A tight braid keeps every layer controlled so nothing slips down to the neck during a commute or a walk. The twist from Twist Me Pretty that I tested at Disneyland held through heat and wind without the readjusting that ponytails need every twenty minutes.
The real advantage is the switch. Styles that start down but transition up, like a low ponytail you can coil into a bun once the temperature climbs, give you two looks without starting over in a bathroom mirror. That flexibility is what makes summer hair manageable, not just pretty.
Frequently Asked Questions
What are some easy summer hairstyles?
Messy buns, braids, ponytails, twisted chignons, and space buns all work well, and most take under ten minutes once you know the sequence. The article covers 27 specific styles that keep hair off your neck while still looking intentional in heat and humidity. Many, like the bubble ponytail or top knot, need only one elastic and a few pins.
How can I keep my hair off my neck in summer?
Buns, braids, and ponytails are the most reliable options for managing heat. A braided bun sits lower and needs fewer pins than a standard twist, while a fishtail braid worn tight keeps every layer locked down against the neck. Half-up styles gathered at the nape also work, since the elastic sits right where your neck meets your skull.
What accessories can I use for summer hairstyles?
Scrunchies dress up space buns fast, especially velvet or satin ones that catch light at dinner. Flower hair clips add an elegant touch to simple updos. For bubble ponytails, tiny clear elastics underneath decorative ones act as insurance without changing the look.