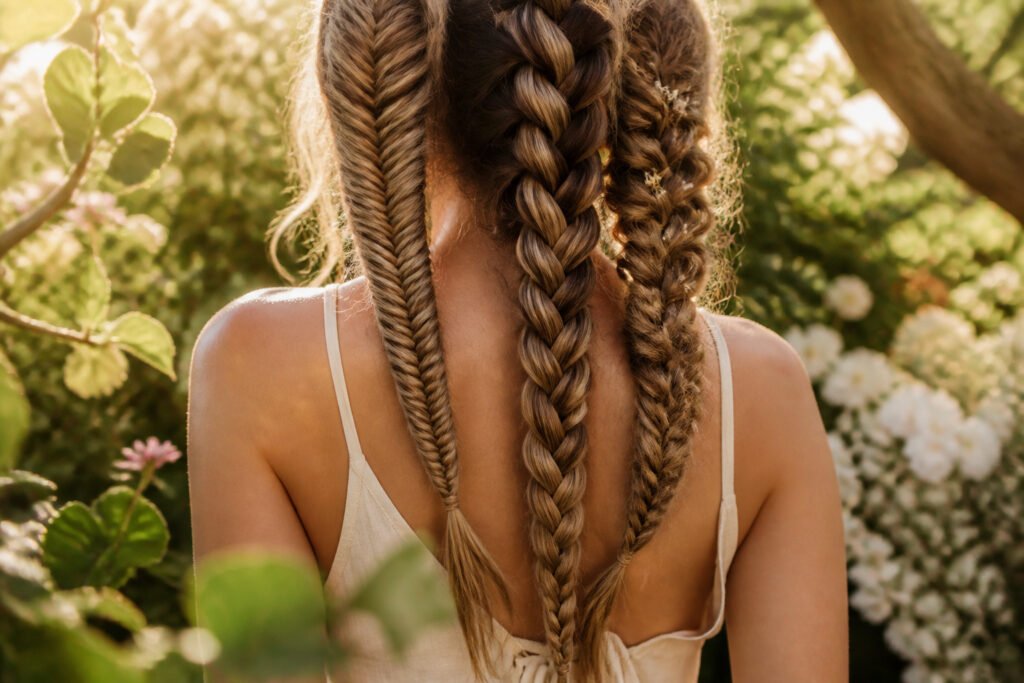
A braid is simply three or more strands of hair woven together, but the gap between "simple" and "styled" is where most people get stuck. The same basic motion produces everything from the flat, scalp-hugging rows of cornrows dating back to 3000 B.C. Africa to the raised, rope-like Dutch braid that Rita Ora’s stylist builds with a counterintuitive underhand motion most beginners fumble for hours. What separates one braid type from another comes down to direction, tension, and whether you feed in extra hair as you work; get those variables wrong and even a "basic" French braid turns lumpy within minutes.
Box Braids

Box braids start with hair parted into square-shaped sections, each one braided from root to tip with extension hair wrapped around the base to form that box-like knot at the root. The extensions add length and volume you would not get from natural hair alone, which is why the style became so recognizable in the ’90s and still carries that same energy now.
The style works as a protective measure for textured hair, keeping your natural strands tucked away while the braids handle the daily wear. You can still pull the braids up, pin them back, or leave them loose, but the underlying hair stays shielded from manipulation and environmental stress.
With the right care, box braids typically hold up for weeks or more before a takedown becomes necessary. The limit is usually new growth at the root and any buildup around the part lines, not the braids themselves failing. That longevity is what makes them practical for anyone trying to cut back on daily styling time without looking like they gave up on the effort entirely.
Knotless Braids

Knotless braids arrived as the answer to a problem most people with box braids had quietly accepted: the tight, raised knot at the root that pulls for days after installation. Instead of anchoring synthetic hair with that knot at the scalp, the stylist feeds in extensions gradually as the braid progresses. The result sits flatter against the head with noticeably less tension, which matters more than comfort alone. Traction alopecia, a form of hair loss tied to tight protective styles, becomes a real risk when knots pull too hard at the root. Celebrity braider Tanasia McLean notes that this gradual feed-in technique, where synthetic hair joins mid-braid rather than at the base, is what spares the scalp that strain.
"Known for their natural, flat-looking roots, knotless braids are done with a gradual feed-in technique… synthetic hair is added to the braid as it goes rather than at the root, like in a traditional box braid, which is another contributing factor to the comfort of this protective style."
— Ipsy
Zendaya, Zoë Kravitz, Jhené Aiko, and Keke Palmer have all worn the style publicly, and the shift shows in salon requests. The tradeoff is time: proper knotless work takes longer to install than traditional box braids. For anyone whose scalp is sensitive or who plans to keep a style in for six to eight weeks, that extra hour in the chair buys healthier hair underneath.
Cornrows

Cornrows sit flat against the scalp, each braid picked up tight so the pattern reads as clean rows or curves against the head. The style dates back to 3000 B.C. in Africa, where the specific arrangement of those rows signaled the wearer’s tribe and social standing. That history matters because the style never fully left; it traveled, adapted, and still carries weight beyond simple aesthetics.
The pattern itself was the message in traditional use, and that precision carries through in how cornrows are built today. Hair is sectioned into straight or curved lines, then braided under tension so each strand lies flat and the scalp shows between. The result lasts weeks with proper care and works on natural textures especially well, though medium to long hair shows the geometry most clearly. What changed over time is the range of those geometries: classic straight-back rows now sit alongside spirals, zigzags, and designs that turn the scalp into a canvas. The adaptability is the point. A style that once communicated identity within a specific community now functions as both protective styling and personal expression across contexts, and the tension between those two uses, historical marker versus everyday choice, is part of what keeps cornrows present in conversations about hair.
Stitch Braids and Feed-In Braids

Stitch braids and feed-in braids are two modern cornrow techniques that solve different problems with the same foundation. Stitch braids use smaller, tightly sectioned intervals to create clean, linear patterns at the scalp, giving that distinctive stitched appearance without relying on extensions. The precision matters: done well, the rows look almost machine-straight; rushed, the sections blur into ordinary cornrows. Feed-in braids take the opposite approach, gradually adding braiding hair as you plait so the braid thickens naturally from root to tip. The result is fuller and more voluminous, but the real win is how the extensions disappear into the base hair rather than starting with an obvious bulk at the scalp.
Both styles reward a professional hand. The tight parting stitch braids demand, and the tension control feed-ins need to avoid pulling at the edges, are skills that take repetition to build. At home, the risk is less a ruined look than a scalp that protests for days. If you are choosing between them, stitch braids win for a sleek, low-profile finish that reads as structure rather than volume. Feed-in braids are the move when you want the drama of thicker plaits without the weight or obvious join of traditional extension methods.
Freestyle Cornrows

Straight-row cornrows run front to back in neat, parallel lines, but freestyle cornrows break that grid entirely. The braider maps curved, diagonal, or even zigzagged paths across the scalp, treating the head like a canvas rather than a ruled page. Yara Shahidi has worn versions where a wired braid construction wraps around the pulled-back base, turning the style into something closer to sculpture than utility.
This approach demands more from whoever holds the comb. An experienced braider can angle the sections to follow the head’s natural curves or to frame the face asymmetrically, but the skill ceiling rises with the ambition of the pattern. The payoff is a style that reads as intentional art rather than maintenance: the same tight, long-lasting hold as classic cornrows, with a silhouette that shifts depending on how light hits the parting.
Occasion matters here. The freestyle route suits moments when the hair is meant to carry the look: a gallery opening, a wedding where the headpiece is minimal, any setting where someone will study your profile from multiple angles. For daily wear or under a hat, the extra hours in the chair and the higher braiding cost rarely justify themselves. Classic straight rows stay the practical default; freestyle is what you book when the braids themselves are the outfit’s focal point.
French Braids

The French braid is the style that comes to mind first for most people when they picture a braid, and that ubiquity is earned. It works by starting three small sections at the crown, then crossing each outer strand over the middle while gradually feeding in more hair from the sides with every rotation. What sets it apart from a standard three-strand braid is that continuous incorporation: the plait anchors flat against the scalp rather than hanging free, which gives it that sleek, polished silhouette that reads as refined without trying hard.
Versatility explains its staying power. Emily Blunt has worn it to red carpet events swept to one side and pinned into an updo, and the same technique holds up through a morning workout or a full workday. Unlike the Dutch braid, which pops outward in reverse relief, the French braid sits flush, so it pairs as naturally with a blazer as it does with a t-shirt. The tradeoff is the learning curve. Keeping tension even while adding hair takes practice, and loose sections near the crown are the giveaway of a beginner attempt. Once the rhythm clicks, though, the braid secures with a single hair tie and stays put without pins or product. That reliability, across hair types and occasions, is why it has outlasted trend cycles that come and go.
Dutch Braids

The Dutch braid is the same three-strand structure as a French braid, but with one technical switch that changes everything: the side sections pass underneath the middle strand instead of over it. That single underhand motion pushes the braid outward so it sits raised on top of the hair, giving it a 3D, almost rope-like definition that a French braid sinks flat against the scalp.
Fine or straight hair shows the effect most dramatically. The raised strands catch light and shadow differently, so the braid reads as texture even on hair that normally refuses to hold a style. On thicker or already textured hair, the look is still there, but the contrast is subtler; the braid merges more with the surrounding volume rather than popping against it.
The technique is often called an inside-out or reverse-French braid, and the difficulty jumps noticeably from the standard version. Celebrity stylist Anh Co Tran has noted that the underhand motion feels backward to most people, which is why Rita Ora’s Dutch-braided pigtails look so much more defined and visible than a comparable French style. The prep matters too: working with detangled, conditioned strands keeps the underhand weave from snagging or breaking as you build the braid downward.
Fishtail Braids

The fishtail braid gets its name from the herringbone pattern it leaves behind, and that texture is what makes the style look far harder than it actually is. Two sections of hair are all you need, not the three or more that most braids demand. The trick to keeping it neat is starting with a low ponytail so the plait doesn’t unravel while you work. Small strands pulled from the outside of each section cross over to the inside of the opposite one, repeated down the length. Thinner strands mean more texture; once finished, pulling the braid apart slightly adds dimension, and a texturizing spray gives it edge. Three steps, two sections, one surprisingly simple result is what makes this style worth learning even if your braiding experience stops at a basic three-strand.
Halo Braids

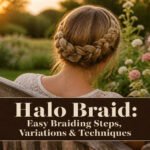
A halo braid wraps around the head like a crown, but softer and more relaxed than the structured regal look of a true crown braid. The style starts with a Dutch braid behind one ear, continues around the head, and tucks underneath at the end, secured with bobby pins.
This is the braid I reach for when a client wants something that works equally well at a garden party or a wedding. The sources describe it as dreamy and ethereal, and that tracks with what I have seen: pulling a few face-framing tendrils loose keeps it from looking too done, which makes the same braid feel appropriate for Saturday errands or for editorial styling.
Hair length changes the execution more than the final effect. On long hair, you get a thick, continuous wrap with enough length to tuck cleanly. On shorter hair, you may need to braid more tightly or accept a slightly thinner halo, though the crown-like silhouette still holds. The half-up variation mentioned in some instructions also helps when there is not quite enough length to circle the full head.
Milkmaid Braids

Milkmaid braids sit lower on the head than a true crown braid, pushed back a couple of inches from the hairline to rest nearer the middle. The style starts with a center part rather than a side part, which keeps the look traditional rather than romantic.
Two braids are formed at the nape, crossed over the crown, and pinned flat. Tucking the ends under the opposite braid matters more than most people think; loose tails lift within an hour and break the vintage line entirely. Bobby pins placed parallel to the braid, not straight across, grip better against the direction of the cross.
What began as practical folk tradition, keeping hair clear of farm work, moved through 1960s festival culture and onto recent runways without much alteration. The construction stayed the same even as the context changed; designers seemed to value that the style reads as handmade rather than salon-sculpted. For daytime events, a white floral top still pairs naturally with the look, though the braid itself does most of the period work.
Waterfall Braids

A waterfall braid works as a half-up, half-down style that lets strands fall through the braid itself, creating the cascading effect that gives it the name. The technique starts like a French braid near the hairline, but after each crossover you drop the lower strand entirely and pick up a new section from above to continue. That dropped section hangs free, which is the critical difference from a standard French braid where both strands stay woven in and the braid tightens against the scalp.
Hair length matters more than most people expect. The falling strands need enough length to actually cascade, so this style shows best on medium to long hair where the dropped sections reach past the shoulders. On shorter cuts the effect gets lost, the "waterfall" becomes more of a trickle, and the half-up portion can look unbalanced against what hangs below. Wavy or curled hair helps the illusion, since the texture gives those free strands movement and keeps them from hanging too straight and flat against the rest of the style.
Mermaid Braids

Mermaid braids sit in that useful middle ground between an everyday style and something that reads as occasion hair. The build starts from a loose French braid, then small outer sections get woven over the main braid as you work down the length. Each added piece creates the layered, almost underwater movement that gives the style its name, and the finished braid carries enough volume to stand alone without accessories.
Two approaches show up depending on the source you follow. The more common method layers those small woven sections directly into the central braid for a continuous, flowing effect. An alternate construction, sometimes called a rib cage braid, works in stacked V-shaped ponytails: you pull two side sections, secure them in a loose V, loop the hair under the elastic over the middle gap, then lay each new V on top of the previous plait. Pulling slightly looser as you stack builds the volume higher.
This one takes practice either way. The weaving rhythm is less forgiving than a standard three-strand, and the small sections tangle if your tension drifts. Day-to-day wear is absolutely possible once the speed comes, but the finished look reads deliberate enough that I would not default to it for a rushed morning. Save it for when you want the hair to do the statement-making without extra clips or pins.
Rope Braids

A rope braid is the easiest entry point into braiding because it skips weaving entirely. You divide the hair into two sections, twist each one tightly in the same direction, then cross them over each other in the opposite direction. That same-direction twist matters more than it sounds: twisting both strands clockwise, then wrapping them counterclockwise, locks the fibers against each other so the braid holds its shape instead of loosening into a twist that slides apart.
The finish is sleeker than a three-strand braid, with a spiral texture that reads as polished rather than casual. I have watched this fall apart on friends who skipped the last step. You need a small elastic at the end, not just tucked-under tension, because the rope structure wants to untwist itself the moment you let go. A clear elastic works best on most hair colors; it disappears against the texture so the rope itself stays the focus.
Goddess Braids

Goddess braids take the neat grid of box braids and interrupt it with loose, curly strands woven in at the midpoint or left free at the ends. Some stylists knot the extensions all the way through, then pull curly human hair out along the shaft for that wispy, romantic texture; others leave the curls concentrated at the ends for a cleaner, more defined look. Either way, the exposed curls change how long the style lasts and how much daily attention it needs.
The unbraided pieces tangle faster than sealed ends, and they draw moisture from the air, so frizz shows up sooner. Washing takes more care too: a sulfate-free shampoo and a leave-in conditioner made for curl control become necessary, not optional, if you want the loose hair to keep its shape. In my view, goddess braids are best treated as a two-to-four-week style rather than the six-to-eight weeks standard box braids can manage. The tradeoff is softness and movement. If you want a protective style you can mostly forget, traditional box braids win. If you want the texture and do not mind refreshing the curls with a light product every few days, goddess braids are the more interesting choice.
Gypsy Braids

Gypsy braids build volume by starting with a knotless braid base and weaving curls through the length of each braid, not just at the ends. The curl pattern runs the full strand, which gives the style its characteristic texture and separates it from goddess braids, where curls typically sit at the bottom and the upper braid stays smooth. Over the last few years, the name itself has drifted in meaning. Stylists and clients now use "gypsy braids" as a broad label for any curly braided look, though the construction still points back to that specific technique: knotless foundation, curls distributed throughout. If you are booking this style, ask for curls integrated into every section, not just the ends, to get the full effect and avoid walking out with something closer to goddess braids.
Bora Bora Braids

Bora Bora braids arrived on my radar the way most styles do now, through a feed full of beach vacation photos where the hair looked too full and textured to be natural but too loose to be traditional box braids. Master braider Omobolanle Ajao created these knotless braids with wavy extensions, and the difference from straight-extension styles is immediate once you see them side by side. Where straight braids hang with uniform weight, the wavy texture catches light differently at every bend, giving the finished look the kind of movement that reads expensive even in a still image.
The construction follows a specific pattern. Small braids are worked in rows from the nape upward, with human hair extensions fed in by the second or third row. The extensions are braided only to the length of your natural hair, then left to flow freely. That transition point matters, because the wavy extensions do the visual work from there down, creating the layered, full effect that makes this style look luxurious rather than merely long. Straight extensions would keep the same density all the way through, which can feel heavy. The wave breaks that up.
What the wavy texture actually adds is volume without bulk. Each bend creates a slight shadow and a slight lift, so the overall silhouette reads fuller than the same number of straight braids would. For women building a wardrobe around pieces that travel well and photograph better, this is the braid style that solves both problems at once.
Bubble Braids

Bubble braids are the style to try when you want the look of a braid without any actual plaiting. The technique is simple: pull your hair into a ponytail or pigtails, add elastics every few inches down the length, then gently tug each section outward to create soft, rounded bubbles. That minimal skill requirement makes this one genuinely accessible across hair types and lengths, from fine strands that struggle to hold a three-strand plait to thick hair that swallows regular elastics whole.
The style reads young and playful, which is why it shows up most often at summer festivals and warm-weather outings. Thicker hair types carry the bubbles especially well; the extra volume keeps each section full rather than collapsed. You can work with a single high ponytail, twin pigtails, or even section a ponytail into multiple bubble rows if you want more texture without committing to a real braid technique.
Synthetic hair extensions work here too, looped in before you start placing elastics if you need more length or density to build the bubbles around. The whole thing takes under five minutes once you find your spacing rhythm, closer together for tighter bubbles, farther apart for looser, softer ones.
Pigtail Braids

Two braids worn on either side of the head, parted cleanly down the middle, carry more styling range than the childhood nickname suggests. The simplest version starts with two low ponytails, each braided in a basic three-strand and secured with an elastic. From there, the same silhouette holds a French braid, a Dutch braid woven on top rather than underneath, or a fishtail for finer texture. Each variation keeps the face-framing symmetry but shifts the mood entirely.
What changed is the finish. A flexible-hold gel smoothed over flyaways turns what read as playground into something deliberate and sleek. I have seen the same base structure worn loose and romantic, pulled tight for graphic contrast, or dressed up with the braids themselves left deliberately imperfect. The versatility is in the execution, not the concept. Two braids on either side of the head work for almost any hair length or texture, and the part down the middle does the face-framing work without extra styling steps.
The reclaiming happened quietly. Adults started wearing pigtail braids not as costume but as one option among many, the way a ponytail or a bun functions. The style no longer signals age; it signals intention.
Cultural Roots and History

Braids have carried meaning long before they became a Pinterest board category. In ancient Africa, the pattern of your cornrows signaled your tribe and social standing, while the hours invested in box braids made them a visible marker of wealth and status dating back to 3500 B.C. Micro braids went even further back, to around 35000 BCE, encoding marital and social information into hair so precisely that a single style could read like a résumé.
What strikes me, reading through the history, is how often these styles traveled against their will and lost their context along the way. The French braid likely originated with Greek and African braiders, not Parisian ones. Dutch braids, despite the name, were created in Africa over 5,000 years ago. The renaming erased the origin. That matters now because the modern revival, visible from salon chairs to red carpets, is finally pairing the aesthetic with acknowledgment. Knotless braids emerged in the early 2000s as a direct evolution of traditional box braids, engineered for less tension on the scalp. Goddess braids and Ghana braids carry forward the same ancient techniques with names that stay tied to their roots.
The loop braid arriving in the mid-2000s and bubble braids hitting mainstream attention around 2023 show the style keeps adapting. What changed is who profits from the storytelling. The difference between wearing a style and honoring it is knowing whether your braider can name the tribe that wore it first.
Styling Tips and Product Picks

The tools that actually earn their keep across different types of braids are narrower than the internet suggests. A rattail comb for clean parting, small clear elastics that do not snag, and a spray bottle for water-only re-moisturizing stay within arm’s reach on my vanity. Everything else rotates in and out of the drawer.
Moisture before you start is the step that prevents the breakage you only notice two weeks later. I mist my hair with plain water, seal with a lightweight leave-in, and then braid; the protective style holds longer when the strand is not already thirsty going in. For the perimeter, edge control at the base gives that finished look without pulling the tension so tight you feel it at your temples. I learned that distinction the hard way after a set of cornrows left my hairline tender for days.
Sizing matters when you are adding extension hair. Keeping your natural sections the same width as the braiding hair you feed in keeps the tension even from root to tip. Mismatched sizes create those lumpy ridges that show up in photos you did not intend to take.
What sits unused in my drawer: braid gels with heavy wax that flake by day three, and any "braid spray" that is mostly perfume and mineral oil. The sleek finish you want comes from technique and water, not from product buildup you will spend an hour washing out later.
Matching Braids to the Occasion

Some braids announce themselves before you speak, and others let you blend into the crowd. A French braid pulled tight and pinned at the nape reads formal enough for most offices where I’ve worked, while a messy braid, loosened by tugging each section apart and pulling a few face-framing strands free, signals weekend plans without trying. The distinction matters when you’re deciding in the mirror at 7 a.m.
Heat and dancing separate styles that merely look good from ones that actually hold up. Micro braids, worn by Zoë Kravitz on red carpets with color switch-ups along the way, are designed to be versatile enough for styling as you please; that same versatility carries through hours of movement. Fishtail braids skew playful and unexpected, their mirror-reflection structure better suited to a festival than a boardroom. Box braids and cornrows function as protective styles for Black hair that can be decorated up or down depending on the setting, while French braids and fishtail braids sit more purely in the decorative column.
The test is where you’re going and whether you’ll have a hand free to fix stray pieces.
Frequently Asked Questions
What type of braid is the easiest?
The rope braid is the easiest entry point into braiding, since it skips weaving entirely. You divide hair into two sections, twist each one tightly in the same direction, then cross them over each other in the opposite direction. The three-strand braid is the easiest traditional woven style, requiring only basic crossing of outer strands over a middle one.
What is the most popular type of braid?
The French braid is the most widely recognized style, largely because of its versatility across hair types and occasions. It sits flat against the scalp with a sleek silhouette that pairs as naturally with formal wear as with casual clothing. Box braids, cornrows, and fishtail braids also rank among the most commonly requested styles in salons.
What type of braids last longer?
Knotless braids, box braids, and cornrows all last several weeks with proper care. Box braids typically hold up for weeks or more before new growth at the root and buildup around the part lines make a takedown necessary. Knotless braids are often kept in for six to eight weeks, since the reduced tension at the root means less stress on the scalp over time.