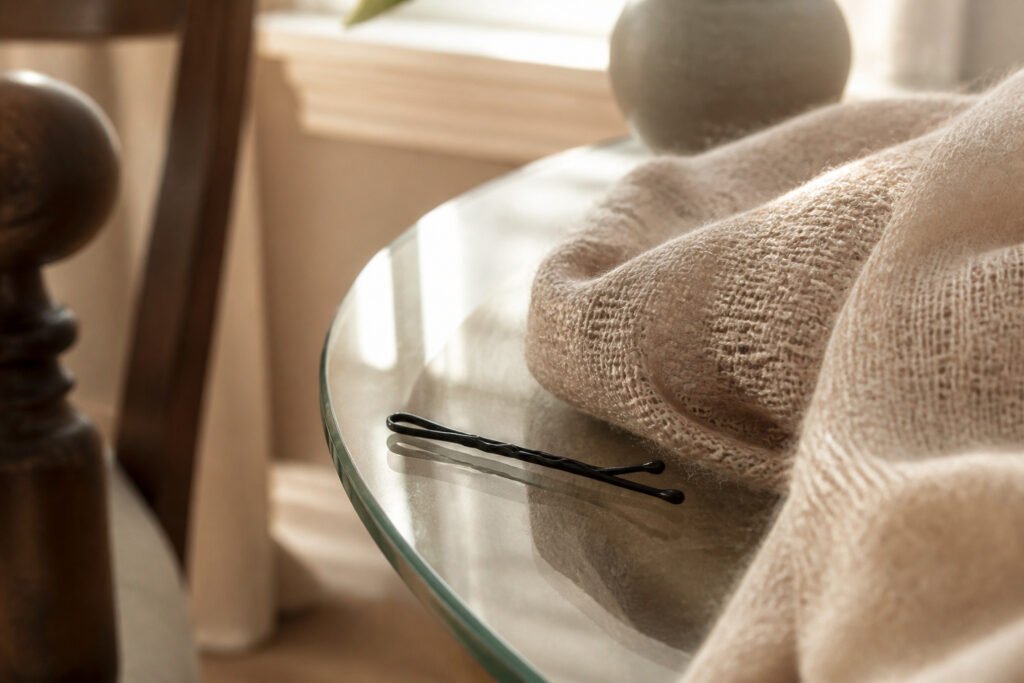
The right way to wear a bobby pin in 2026 depends on whether you want it seen or not. A single gold pin above the temple reads as jewelry, while a matte black one at the roots disappears into a snatched ponytail. The wavy side always faces your scalp, ridges down, or the grip fails within the hour. That one rule separates the styles that hold from the ones that slide.
Most people overload the pin. Half an inch of hair is the limit for a standard size; anything more and the spring tension gives out by lunch. Goody’s XXL line exists for a reason, and it is not your hair color.
1. Stacked and Edgy

A middle part gives this style its backbone. Without that clean center line, the pins drift and the whole look softens into something accidental rather than intentional. I use a fine-tooth comb when I want the part sharp, or my fingers when I want the line to look like it happened on its way somewhere else.
Leave about half an inch between each pin. That gap is what turns a practical hold into a visual beat. Hair shows through, so the pins read as decoration, not repair. Three on each side, set parallel and close to the temple, pulls the front sections back without flattening the volume underneath.
The spacing matters more than the number. Crowd them and they disappear; spread them too wide and the rhythm breaks. Half an inch keeps the eye moving down in a straight line, which is what gives this its edge. It works best when your hair is already down and you want the front controlled without committing to an updo. Growing-out bangs or a color you want to frame rather than hide both play well here.
2. Criss-Cross

A deep side part changes how the whole face reads, and it does half the work for this style before a pin ever touches your hair. The part creates an immediate diagonal line that the criss-cross then echoes, so the eye travels in one clean sweep from forehead to jaw rather than stopping on a single vertical pin.
Tuck the front section behind your ear on the heavier side of the part. Slide one bobby pin diagonally toward the back of your head, ridges facing down toward the scalp for the stronger grip that placement gives. Take a second pin and cross it over the first, forming an X. The intersection locks both pins in place so neither can slide backward, which is why parallel pins fail after an hour and these stay put through a full day.
The wavy side belongs against your scalp, not facing out; that is where the grip happens. Smaller sections hold better than thick ones, especially if your hair is fine. For thick hair that fights back, a heavier gauge pin, something like Goody’s XXL line, can manage the section alone, but two crossed still beat one every time.
3. Triangle

A half-up style held with pins instead of an elastic gives the back of your head a clean, architectural look. Three pins form the triangle, and placement matters more than count.
Start with two sections pulled from either side of your head. Cross them at the back where a ponytail elastic would normally sit. Slide one pin upward at an angle to anchor the left section, then mirror it on the right so the two pins form an upside-down V. The third pin closes the shape from below, completing the triangle with its base running across the nape and the point aiming toward your crown.
For the cleanest lines, each pin needs to grip both the crossed hair and the layer beneath it. A pin that only skims the surface slides out by noon. The crisscross at the center hides the mechanics; from a few feet back, the triangle reads as a deliberate design choice rather than a substitute for a hair tie.
4. Snowflake

A snowflake pattern built from bobby pins reads cleanest when you place it above one ear or at the temple, where the shape catches light against the hair without fighting the part line. The build starts with one pin slid vertically, a second slid horizontally across it to form a plus sign, then two more slid diagonally to finish the six-point shape. That is four pins total per snowflake, which keeps the weight light enough that the cluster stays put through an evening.
Matte pins grip better than shiny ones for this, and a quick mist of hairspray on the metal before you insert them adds staying power, especially if your hair is fine or freshly washed. I would skip the hairspray step on coarse hair, where the texture already does the holding and the residue just dulls the finish.
Light blue or silver rhinestone pins turn the shape into something seasonal without adding actual jewelry to the mix. The embellishment matters here because the snowflake is small, and a plain black pin at that scale disappears into most hair colors. If you want the geometry to show, you need either the reflective surface or a deliberate contrast against your tone.
5. Chevron

A chevron pattern reads clean only when every pin sits at the same angle, so I lay the first bobby pin diagonally across the section, then mirror the second pin to meet it at a sharp point. The V-shape collapses into a lazy zigzag if either leg drifts even a few degrees off. Point the open end of the pin downward and the V opens upward, like an arrow toward the crown; flip the direction and the chevron points toward the nape, which drags the eye down in a way that can shorten a round face. I wasted half a pack of pins once trying to alternate directions along the same row, thinking it would look rhythmic, but the pattern just looked like scattered hardware. Stick to one direction per row, keep the spacing even, and the chevron does the decorative work without extra embellishment. Dark pins against light hair show the geometry best; on dark hair, the matte black ones disappear unless you catch the light just right, which some people prefer.
6. Hashtag

Four bobby pins arranged in a hashtag shape read as jewelry on hair that is pulled back cleanly. Two pins slide in horizontally, parallel and slightly apart, then two more cross them vertically through the center gap. The overlap is what makes the grid read instantly; without it the shape collapses into two random lines.
This works best on a section of hair that is smooth and held taut, since any looseness shifts the pins and blurs the geometry. A ponytail base, a tight half-up, or a low bun all give that stable ground. Hair length matters less than section size: too much bulk and the pins sit on top instead of gripping through, so a panel no wider than the span of the pins themselves keeps the hashtag flat and visible.
I have tried this on second-day hair with too much texture, and the pins skidded. A quick mist of hairspray on the pins before sliding them in, or on the hair section first, gives the metal enough purchase to stay locked in their cross. Standard-size pins work for fine hair; coarser hair needs the jumbo ones or the wider grid swallows the detail.
7. Bobby Pin Art

Visible bobby pins stop hiding and start talking. A line of metallic gold pins marching back from the temple, or a cluster of matte rose ones fanning above the ear, turns a functional hold into the whole point of the style. The runway versions that caught my attention used pins as deliberate strokes, almost like drawing on the hair itself.
Painting plain pins yourself keeps the cost minimal and the palette exact. Clip them to paper, brush on nail polish in whatever metallic or color matches the outfit, and let them dry fully before they touch hair. A few drops of nail glue and tiny pearls or crystals push the look further, though a single clean color often reads more expensive than heavy embellishment.
The shift happens when you stop apologizing for the pin and let it sit where the eye lands first.
8. Pin Curls

Pin curls sit flat against the scalp, which means the clip you would normally use to hold the curl while it sets can leave a dent or bulk where you do not want it. A bobby pin solves this because its two prongs lie nearly flush with the skin. The wavy side faces down, pressed against the scalp, and the straight arm covers the hair section to keep it smooth. Those ridges grip the coiled hair without shifting, and because the pin is metal and slim, it cools at the same rate as the curl itself. When you remove it, the ridge pattern from the waves is minimal and brushes out in seconds, something a plastic clip never managed for me. For a full head of vintage waves, you will use more pins than you expect, but each one disappears into the set. The wavy side always faces your scalp; reversed, the pin slides out and the curl falls flat before you even reach for the hairspray.
9. Hide Bangs

Growing out bangs or fighting a cowlick on humid mornings means finding a way to pin those front pieces back without a metal bar flashing at your hairline. The angle matters more than the number of pins. Slide the bobby pin upward toward the crown or at a slight backward tilt, never straight horizontal or pointing down, and the hair stays caught instead of sliding out within the hour.
The wavy side belongs against your scalp, not facing the mirror. Those ridges grip fine front hair that the smooth side would let slip, while the flat top disappears against your part line. I used to flip them the other way thinking the decorative side should show, and spent half my commute re-clamping stray pieces. One pin at the right angle usually holds short layers through a workday; two spaced an inch apart buys you an evening out. Just check that no loose strands got snagged in the clamp on your way out the door.
10. Secure Updos

A single bobby pin slid straight up toward the crown will hold a twist for about an hour, maybe two if you stay still. For an updo that lasts through a commute and a workday, cross-pinning changes everything.
The technique is simple: slide the first pin horizontally through the base of the twist or bun, wavy side down against the scalp. Take a second pin and weave it vertically, or at a sharp angle, over the first so they form an X. The intersection locks both pins in place against the hair and the head, distributing tension so one spot does not fatigue and slip.
How many pins you need depends on what you are holding. A simple twist at the nape usually stays put with four to six pins arranged in two or three X formations. A full bun, especially with layered hair, can swallow eight or ten before it feels solid. The flat arm of each pin should cover the section you are securing, not just poke through it, and a light mist of finishing spray before the last pin goes in adds grip without the helmet effect.
11. Decorative Accents

A single metallic bobby pin slid above the temple does more to wake up a ponytail than a drawer of claw clips ever managed for me. The trick is letting one deliberate pin do the work of ten hidden ones: place it where the light catches, not where the hair needs holding. Lara’s approach, painting plain pins with nail polish or pressing on a single pearl, costs nothing and reads as intentional from six feet away. Rihanna’s regular black pins worn visibly proved the same point. Scale separates this from bobby pin art: one pin, or a matching pair at each ear, rather than building patterns from a dozen. The embellished ones I reach for are smaller than you’d think, maybe an inch and a quarter, because anything longer fights the hairline instead of tracing it.
12. Volume Boost

Teased hair collapses the second you press a pin flat against it. The trick is sliding the bobby pin in with the wavy side down toward the scalp, catching only the underside of the teased section while the flat arm skims over the top without crushing the lift. I angle it slightly upward, toward the crown, never straight horizontal or the whole section slides.
Placement matters more than pressure. I push the pin deep enough that the teased hair billows above it, then let a smooth top layer fall over the anchor. On fine hair, one pin rarely holds; two crossed in an X underneath the tease grip harder than either could alone. Matte pins help, and a quick mist of hairspray on the metal before insertion adds friction without adding weight to the crown.
The best volume looks accidental. A pin sitting half-visible at the roots ruins that illusion, so I check the silhouette from the side before I finish. If I can see metal, I pull it, tease again lightly, and re-anchor an inch deeper.
13. Wrap Ponytails

A wrapped ponytail reads as intentional in a way a plain elastic never does, and the whole trick sits in how much hair you borrow for the job. One inch is the section to reach for, pulled from underneath the pony so the end tucks neatly against the scalp. Wrap it around the base, spiraling until the elastic disappears completely, then slide the bobby pin into the ponytail’s base to lock the tail in place. The pin needs to catch both the wrapped strand and the hair beneath it, or the wrap loosens by noon. Driving it straight into the elastic itself, rather than angling down into the gathered hair, leaves the pin visible and the wrap unstable. Two pins set in an X work for thicker hair, but a single flat pin, wavy side down, usually holds that one-inch section without adding bulk. The end of the wrapped strand should disappear under the spiral, not hang free as a loop you have to tuck later.
14. Secure Hairpieces

A standard bobby pin can hold a lace front wig from sliding, but the grip fails fast once the piece gets heavy or the day gets long. The wavy side has to sit flat against your scalp, not the hair, and even then the pin is working at the edge of what it was built for. For anything thicker than a light topper, the pin bends open or the whole piece shifts by hour three.
Two ways to play this: stay with bobby pins and double them up at every anchor point, or switch to a comb-and-clip system built for weight. The comb wins if you are moving much; extra pins win only if you already own a drawer of them and the piece is short-term. Either way, be gentle sliding the pin through wig fibers. Pulling or tearing at the base damages the weft or the lace, and that damage shows before the style fails.
15. Bantu Knots

Bantu knots rely on tension against the scalp, and bobby pins can either back up the traditional coiling method or stand in for it entirely. The wavy side pressed flat against the head gives the grip that keeps each section from unwinding, especially where the coil alone wants to loosen at the base.
Coarser hair holds this approach best. The texture gives the pin something to bite into, and a jumbo bobby pin matched to slightly larger sections keeps the hold without sliding. Fine hair needs more help: a matte pin, a quick mist of hairspray across the metal before insertion, or two pins crossed at the center of the knot for stability. The crisscross pattern locks the coil in place when the hair itself offers less natural resistance.
Slipping usually means the pin is too wide for the section, or the angle is off. Slide it toward the top of the head rather than straight across; horizontal placement lets the hair fall out the back of the pin. Multiple pins for heavier sections beats one pin forced to do all the work.
16. Messy Buns

A messy bun only holds its shape when the chaos follows a few rules. The strands that look randomly escaped are usually the ones pinned first, before the elastic goes in. I start by twisting the length loosely, then I anchor the base with two bobby pins pushed in opposite directions so they lock against each other. The wavy side faces down against the scalp; that textured edge is what keeps the grip when the bun gets tugged during the day.
The pieces that fall out later, the ones that frame the face or trail at the nape, those get pinned last with a single pin slid in against the hair’s natural pull, then rotated and pushed the direction the section wants to go. Spray dry shampoo on the pin first if your hair is fine or freshly washed; the added texture stops slippage without making the bun look stiff. The paradox is that the messiest sections need the most deliberate placement, while the crown and sides stay looser with fewer pins so the shape collapses softly rather than holding like a helmet.
How to Insert a Bobby Pin

The wavy side of a bobby pin belongs against your scalp, not facing up. That textured surface grips the hair; the flat side simply slides. Most people figure this out backward, and the pin slips all day.
Angle matters too. Slide it toward the crown or slightly back, never straight down or flat across, or the hair walks right out. For a standard pin, grab about half an inch of hair. Jumbo pins need closer to an inch to seat properly.
A quick mist of dry shampoo or hairspray on the pin before insertion buys extra hold. The product adds texture the wavy side can bite into, which matters on clean, silky hair that wants to escape. Cheap pins fail this test: spread the prongs and let go. If they stay open, the spring is dead and the grip is fiction.
Bobby Pins for Your Hair Type

The right bobby pin for your hair type is the difference between a style that holds until lunch and one that slides out by 9:15. Thicker hair needs a thicker pin, plain and simple. Goody’s XXL bobby pins run larger, longer, and stronger than standard, with two straight metal prongs built for a secure grip on coarse or heavy sections. Standard pins, meanwhile, are the better match for fine hair. A jumbo pin wedged into thin strands grips nothing and either slips free or tears what it catches.
I learned the hard way that size mismatches work both directions. Standard pins in thick hair bend open and lose tension after a few uses; oversized pins in fine hair create visible gaps and stress points that break strands over time. The fix is cheap enough. A pack of Goody XXL pins runs about $5 on Amazon, while standard pins cost even less. Buy the size that matches your texture, and replace them when the prongs gap open. A stretched bobby pin is a useless bobby pin, no matter what you paid.
What I Used to Get Wrong

Using too much hair per pin was the mistake that cost me the most time before I understood what bobby pins actually do. The metal has a fixed spring tension, and once you overload it, the grip fails in minutes. Twisting smaller sections and pinning them separately holds all day where a single overloaded pin slides loose in twenty minutes.
Wet hair was another lesson learned the hard way. Pins pressed into damp strands leave dents that do not brush out, and the tool tangles more easily against softened cuticles. Waiting until hair is fully dry avoids both the indentation and the extra breakage risk when you pull them free.
The protective coating on the tips matters more than the color match. Once that small plastic or rubber cap wears off, the exposed metal end can scratch the scalp and snag individual strands. A bobby pin that has been stretched open too many times loses its spring and will not recover, so replacing bent pins costs less than repairing the damage they cause.
Hidden or On Display

Bobby pins started out as strictly functional, meant to disappear into the hair and keep a style in place without anyone noticing. That invisible role still matters for certain looks. A super-snatched high ponytail, for instance, calls for pins that match your hair color and stay out of sight. The same goes for pinning back growing bangs or shorter layers that refuse to cooperate; a small black pin against dark hair keeps the focus on your face, not the hardware.
Somewhere along the way, that changed. Sarah Jessica Parker made visible bobby pins feel intentional rather than sloppy on Sex and the City, and the shift stuck. Now pins come in metallics, colors, even shapes with words like "love" or "queen" worked into the design. Visible pins work best when they read as deliberate, not as a fix for something falling apart. I tend to reach for them in two situations: swept-back front pieces where a gold or silver pin becomes part of the line of the style, or a casual updo where a few contrasting pins in back add interest without trying too hard. The choice between hiding and showing comes down to whether the pin is doing structural work or decorative work, and whether you want credit for the mechanics or the finished look alone.
Bobby Pins Versus Hairpins

Bobby pins and hairpins are not the same tool, and swapping one for the other is usually where a style falls apart. Bobby pins press together tight, with ridges on one side that grip hair flat against the scalp. That closed tension makes them the right pick for taming flyaways or locking down the end of a braid. Hairpins stay open in a U shape, so they slip through a bun or updo without squeezing the shape out of it.
The choice depends on how much hold you actually need. A teased style with volume, something Gina Rivera notes is the classic territory for hairpins, wants that lighter touch so the lift doesn’t collapse. Holly Dear puts bobby pins at the scalp for control, and Andrew Fitzsimmons calls them more cooperative for novices, though he admits U- and V-shaped pins take extra wrangling for the payoff of a looser, more versatile finish. I used to grab whatever was in the drawer and wonder why my twists went flat; now I reach for hairpins when I want the style to breathe, and bobby pins only when something has to stay put.
Frequently Asked Questions
How do you use bobby pins?
Slide the bobby pin in with the wavy side facing down toward your scalp; those ridges grip the hair while the flat side simply slides. Angle it slightly upward toward the crown or back, never straight horizontal or downward, or the section will walk out within the hour. Grab about half an inch of hair for a standard pin, closer to an inch for jumbo sizes.
What are the best ways to style hair with bobby pins?
Stacked rows at the temple control growing-out bangs while keeping volume underneath, crossed pins in an X lock front sections in place all day, and three pins arranged as a triangle can replace a ponytail elastic for a clean half-up look. For decoration, a single metallic pin above the temple or a painted DIY version turns functional hardware into the whole point of the style.
Can you use bobby pins on wet hair?
No, wait until hair is fully dry before inserting bobby pins. Pins pressed into damp strands leave dents that do not brush out, and the metal tangles more easily against softened cuticles, raising the risk of breakage when you pull them free.
What is the difference between bobby pins and hairpins?
Bobby pins press together tight, with one ridged side built to grip hair against the scalp for a secure hold on finished styles. Hairpins are more open, typically U-shaped, and offer a lighter hold meant for keeping updos in place without the same tension against the head.