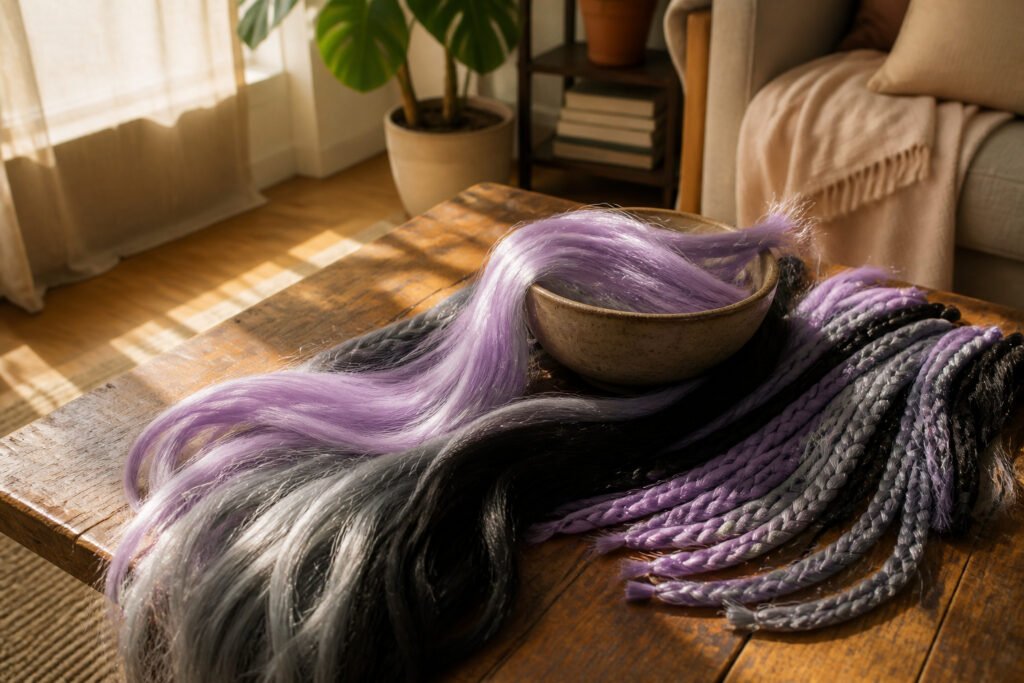
You can finish simple DIY box braids at home, but the install will cost you anywhere from several hours to a full 12-hour day depending on which technique you choose and how much of your own head you can actually see. Most beginners get tripped up by rushing the back sections, where sloppy parts and brutal tension turn a protective style into a breakage factory. One braider used 8 bags of ombre braiding hair in black, lilac and grey to complete her own install at that density and length, so plan your supply run accordingly.
1. Prep Your Hair

Clean hair first. Two weeks of buildup trapped under braids can turn a protective style into a breakage factory, so shampoo thoroughly and follow with enough conditioner that your strands actually feel soft when you run your fingers through. Detangle in sections, working from the ends up, so you are not fighting knots for two hours the next morning.
Blow-dry or band your hair while it dries to stretch it out; African threading also works if you prefer zero heat. The point is manageability, not straightness. Hair that holds some stretch but stays easy to part will braid faster and with less tension on your scalp. Fully dry is the rule, not the exception. Starting with damp or fragile hair raises the odds of snapping strands when you eventually take the style down, and that defeats the whole point of doing the work yourself.
2. Gather Supplies

Braiding hair sits at the top of the list, and the amount you buy should match the finished look you want rather than copying someone else’s number exactly. Medium braids generally require fewer packs than small or extra-long braids, which matters when you’re standing in the aisle trying to decide between six bags and ten. One braider landed on 8 bags of ombre braiding hair in black, lilac and grey for her own install, so that gives a rough anchor if you’re going for a similar density and length.
A rat tail comb and sectioning clips keep the parts clean, which is half the battle with DIY box braids. Edge control or a braiding gel holds the roots neat during the grip, and mousse or foam helps set the finished braid. Small scissors, a crochet needle and rubber bands sit in the optional pile; the needle speeds up pre-sectioned installs, while rubber bands can anchor the base if your hair texture needs the extra hold.
3. Part Your Hair

Freshly washed and conditioned hair gets blown out first, then moisturized with a creme before any parting happens. Three working sections make the whole head manageable: two on the sides and one in the back, each secured out of the way so you are only ever looking at one panel at a time.
A beginner should plan on several hours, possibly stretched across multiple days. Professionals move fast because they have sightlines you do not; the back of your own head costs serious time. Rushing halfway through is where parts go sloppy, tension gets brutal, and one braid suddenly carries enough hair for three. I write that from watching too many evening braiding sessions dissolve into regret. Give yourself permission to stop, part the remaining sections fresh the next morning, and return with patience intact.
4. Choose a Braiding Technique

Four braiding techniques sit on the table for home box braids, and the gap in difficulty between them is real. Knotless braids and traditional box braids both require you to feed extension hair in while keeping tension clean from the first loop, which sounds straightforward until your fingers prove otherwise. The traditional grip at the base has its own learning curve; knotless keeps going past that curve because the feed-in never stops.
The easier paths use shortcuts. The lay-on-top method, the rubber-band method, and the crochet-assisted method all skip that continuous feed-in tension. Rubber bands gather sections neat and tight, which helps especially with short hair, though they can pull and break strands if you snap them on too tight or use them without care. The crochet method works particularly well when you don’t want to cornrow at all; you can slick hair back into a bun and crochet added hair straight into that base, or braid your own hair into small individual braids first and pull extension hair through with a crochet needle to continue each braid. That rubber-band-plus-crochet hybrid trades a slight bulkiness at the knot for far simpler handling. There is no prize for choosing the hardest technique. The one you can execute neatly without yanking your scalp wins.
5. Install the Braids

A clean part does more for the finished look than any amount of speed. At the back, part straight across; at the top, use a diamond part. Either way, keep the parts visible as you work so the grids stay even.
Tension is the part that took me longest to get right. A braid should feel secure, not tight enough to throb. Pulling too hard puts stress on the root, and over time that pressure can lead to breakage and traction-related hair loss, especially around the edges and temples. If you see a bump forming at the root, loosen it immediately or take the braid down and redo it. Pain is not a sign the style is neat.
Rushing comes from underestimating the time. One user logged 12 hours total for the install, and that is realistic for a beginner learning to feed in extension hair while keeping tension steady. Give yourself permission to stop, come back, and finish in stages. The back of your own head is slow to reach and slower to see; sloppy parts and uneven tension show up when you try to hurry through it.
6. Finish and Secure

The last step with synthetic hair is sealing the ends so they do not unravel. I bring a pot of water to a boil, then remove it from the heat and let it settle for a minute before dipping the braid tips in. The water should be hot enough to melt the fiber slightly but not so hot that it boils over or splatters; a quick dip of ten seconds or so does it, then a towel pat and air dry. Some brands of braiding hair respond better to this than others, so testing one braid first saves the whole head.
Before braiding, some people soak the bundled "roots" of the braiding hair in warm water mixed with a cup of apple cider vinegar for twenty minutes, rinsing afterward until the water runs clear. This removes the alkaline coating that can make the scalp itch. The hair needs to dry overnight before use, so it is a true prep-day step, not something to rush through the morning of.
Braiding Techniques Compared

Four methods compete for beginners doing box braids at home, and the gap between them is wider than the finished braids suggest. Traditional braids build from a knot at the root, which means learning to grip extension hair against the scalp with enough tension to hold but not so much that it strains. That grip has a learning curve. Knotless braids skip the knot and feed hair in gradually, which looks cleaner and feels lighter, but maintaining even tension while adding hair mid-braid is harder for true beginners. Neither method rewards rushing.
Simpler alternatives exist for hands still learning rhythm. The rubber-band method gathers each section with a small band before braiding, which keeps parts neat and removes one variable. The tradeoff is slight bulk at the root and, for some, worry about bands catching or pulling hair over time. Crochet offers the fastest path: braiding hair is looped onto existing hair with a latch hook, and a no-cornrow version works by slicking natural hair into a tight base, either a bun or individual braids, then crocheting extension hair directly into that foundation. The no-cornrow route skips learning cornrows entirely.
The no-cornrow crochet method is the easiest entry point if speed and low tension matter most, though the finished style sits differently than braids built strand by strand. Rubber-band braiding lands in the middle for control without cornrow skill. Traditional and knotless reward the time invested but cost more practice hours upfront.
| Method | Cornrows Needed | Tension Control | Best For |
|---|---|---|---|
| Traditional | No | Moderate, at the knot | Clean, long-wearing style once grip is learned |
| Knotless | No | Harder, throughout the braid | Lightweight finish; not ideal for first attempts |
| Rubber-band | No | Easier, bands hold sections | Short hair or shaky parting skills |
| Crochet (no-cornrow) | No | Minimal | Fastest install, lowest learning curve |
How Many Packs You Need

How many packs you need for simple DIY box braids shifts with four things: your own hair’s density, the braid size you want, the length you’re going for, and which brand’s packs you’re holding. Medium braids eat fewer packs than small ones or anything extra-long, since each section carries more of your natural hair and less extension. For a concrete starting point, eight bags of ombre braiding hair handled one full head in a documented install, though that particular style mixed black, lilac, and grey for a color-blocked look. Five to seven packs is the safer general range most buyers land on, and grabbing one extra is the smarter move; running short mid-braid means a second trip to the beauty supply or waiting on delivery while half your head is sectioned and ready. Brand texture varies enough that two packs of one line might bulk up the same as three of another, so sticking with what you can see in person, or at least with a brand others have already braided through, keeps the guesswork manageable.
Hair Preparation Methods

Clean, conditioned, detangled hair is the base that makes or breaks a DIY box braid session. I learned this the hard way after braiding over old product buildup once and watching flakes collect at my roots within days. Now I always start with a thorough cleanse, follow with conditioner, and detangle gently so the strands feel soft and manageable before I even pick up a comb.
Stretching matters just as much as moisture. Blow-drying with heat protectant or banding overnight gives you strands that are easier to separate and grip without fighting tangles the whole way through. The goal is not bone-straight hair; it is hair cooperative enough that your fingers and comb move through it without resistance. Tangled, fragile, or heavily coated hair makes the process harder and increases breakage when the style eventually comes down, so the extra hour of prep pays back in speed and hair health.
Maintenance While Wearing

Satin or silk is the only covering worth sleeping in once the braids are in. Cotton pillowcases pull moisture and friction through every braid, and by morning the fuzzy halo along each part line tells the story. A scarf or bonnet, tied without tension at the edges, keeps the style intact for weeks rather than days.
The real maintenance mistake is overhandling. Constant twisting, restyling, or pulling braids up and down wears the roots and invites frizz faster than any pillowcase. The goal is to maintain the style, not shellac it into place; a light mousse or foam can smooth flyaways when needed, but excess product builds up and turns the scalp gritty.
Keep the scalp clean without rough scrubbing. A diluted cleanser worked along the part lines, rinsed carefully so the braids themselves stay mostly dry, prevents the itch and tightness that makes people tear braids out early. When buildup, matting, or real scalp discomfort sets in, the style has become harder to maintain safely. That is the signal to remove them, not to push another week.
Frequently Asked Questions
Are box braids easy to do yourself?
They can be, but expect a real learning curve. Traditional and knotless braids both require you to feed extension hair in while keeping tension clean, which is harder than it sounds. Most beginners do better with rubber-band or crochet-assisted methods that skip the continuous feed-in entirely.
What is the easiest box braid method for beginners?
The no-cornrow crochet method is the easiest entry point. It loops braiding hair onto a slicked-back base with a latch hook, so you skip both cornrows and the tension struggle of feeding in hair mid-braid. Rubber-band braiding lands in the middle for control without needing cornrow skill.
How many packs of hair do you need for box braids?
Five to seven packs is the general range most people land on, though one documented install used eight bags of ombre hair for a similar density and length. Your own hair’s thickness, the braid size, the length you want, and the brand’s pack size all shift the number. Buying one extra pack beats running short halfway through.
Can you do box braids on natural hair?
Yes, and that is the standard way they are worn. The key is proper prep: clean, conditioned, fully detangled hair that has been stretched for manageability. Moderate tension matters too; a braid should feel secure, not tight enough to throb, or you risk breakage and traction-related hair loss over time.
How long should you leave box braids in?
There is no set number of weeks. Take them out when buildup, matting, or real scalp discomfort sets in, since that signals the style has become harder to maintain safely. Pushing past that point raises the risk of breakage when you finally remove them.